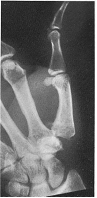
LATERAL THUMB PROJECTION
Specific lateral projection for complete evaluation of the first digit (thumb)
SPECIAL CHARACTERISTICS OF THE THUMB
The thumb (first digit) has unique anatomical features:
- The only digit with only two phalanges (proximal and distal)
- Saddle-type carpometacarpal (CMC) joint
- Greater mobility and functionality than other fingers
- Opposable position to the other digits
- High incidence of Bennett and Rolando fractures
- Rhizarthrosis (trapeziometacarpal osteoarthritis) is common
Exposure Factors
Very low for maximum definition
Minimum exposure
Optimized Parameters: Minimum exposure for maximum resolution of small thumb structures.
Visible Anatomical Structures
The following must be clearly observed in a true lateral projection:
- Distal phalanx of the thumb
- Proximal phalanx of the thumb
- Full first metacarpal
- Trapezium bone (articulation with the 1st metacarpal)
- Thumb interphalangeal (IP) joint
- Thumb metacarpophalangeal (MCP) joint
- First carpometacarpal (CMC) joint
- Preserved joint spaces
- Periarticular soft tissues
Radiographic Plate Configuration
18 × 24 cm cassette divided transversely into 3 portions
- Purpose: Perform 3 projections on the same plate
- Projection 1: AP Thumb (upper third)
- Projection 2: Oblique Thumb (middle third)
- Projection 3: Lateral Thumb (this technique, lower third)
- Advantage: Complete 3D study on the same support
- Economy: Significant reduction in costs and radiation exposure
- Technique: Precise collimation for each individual third
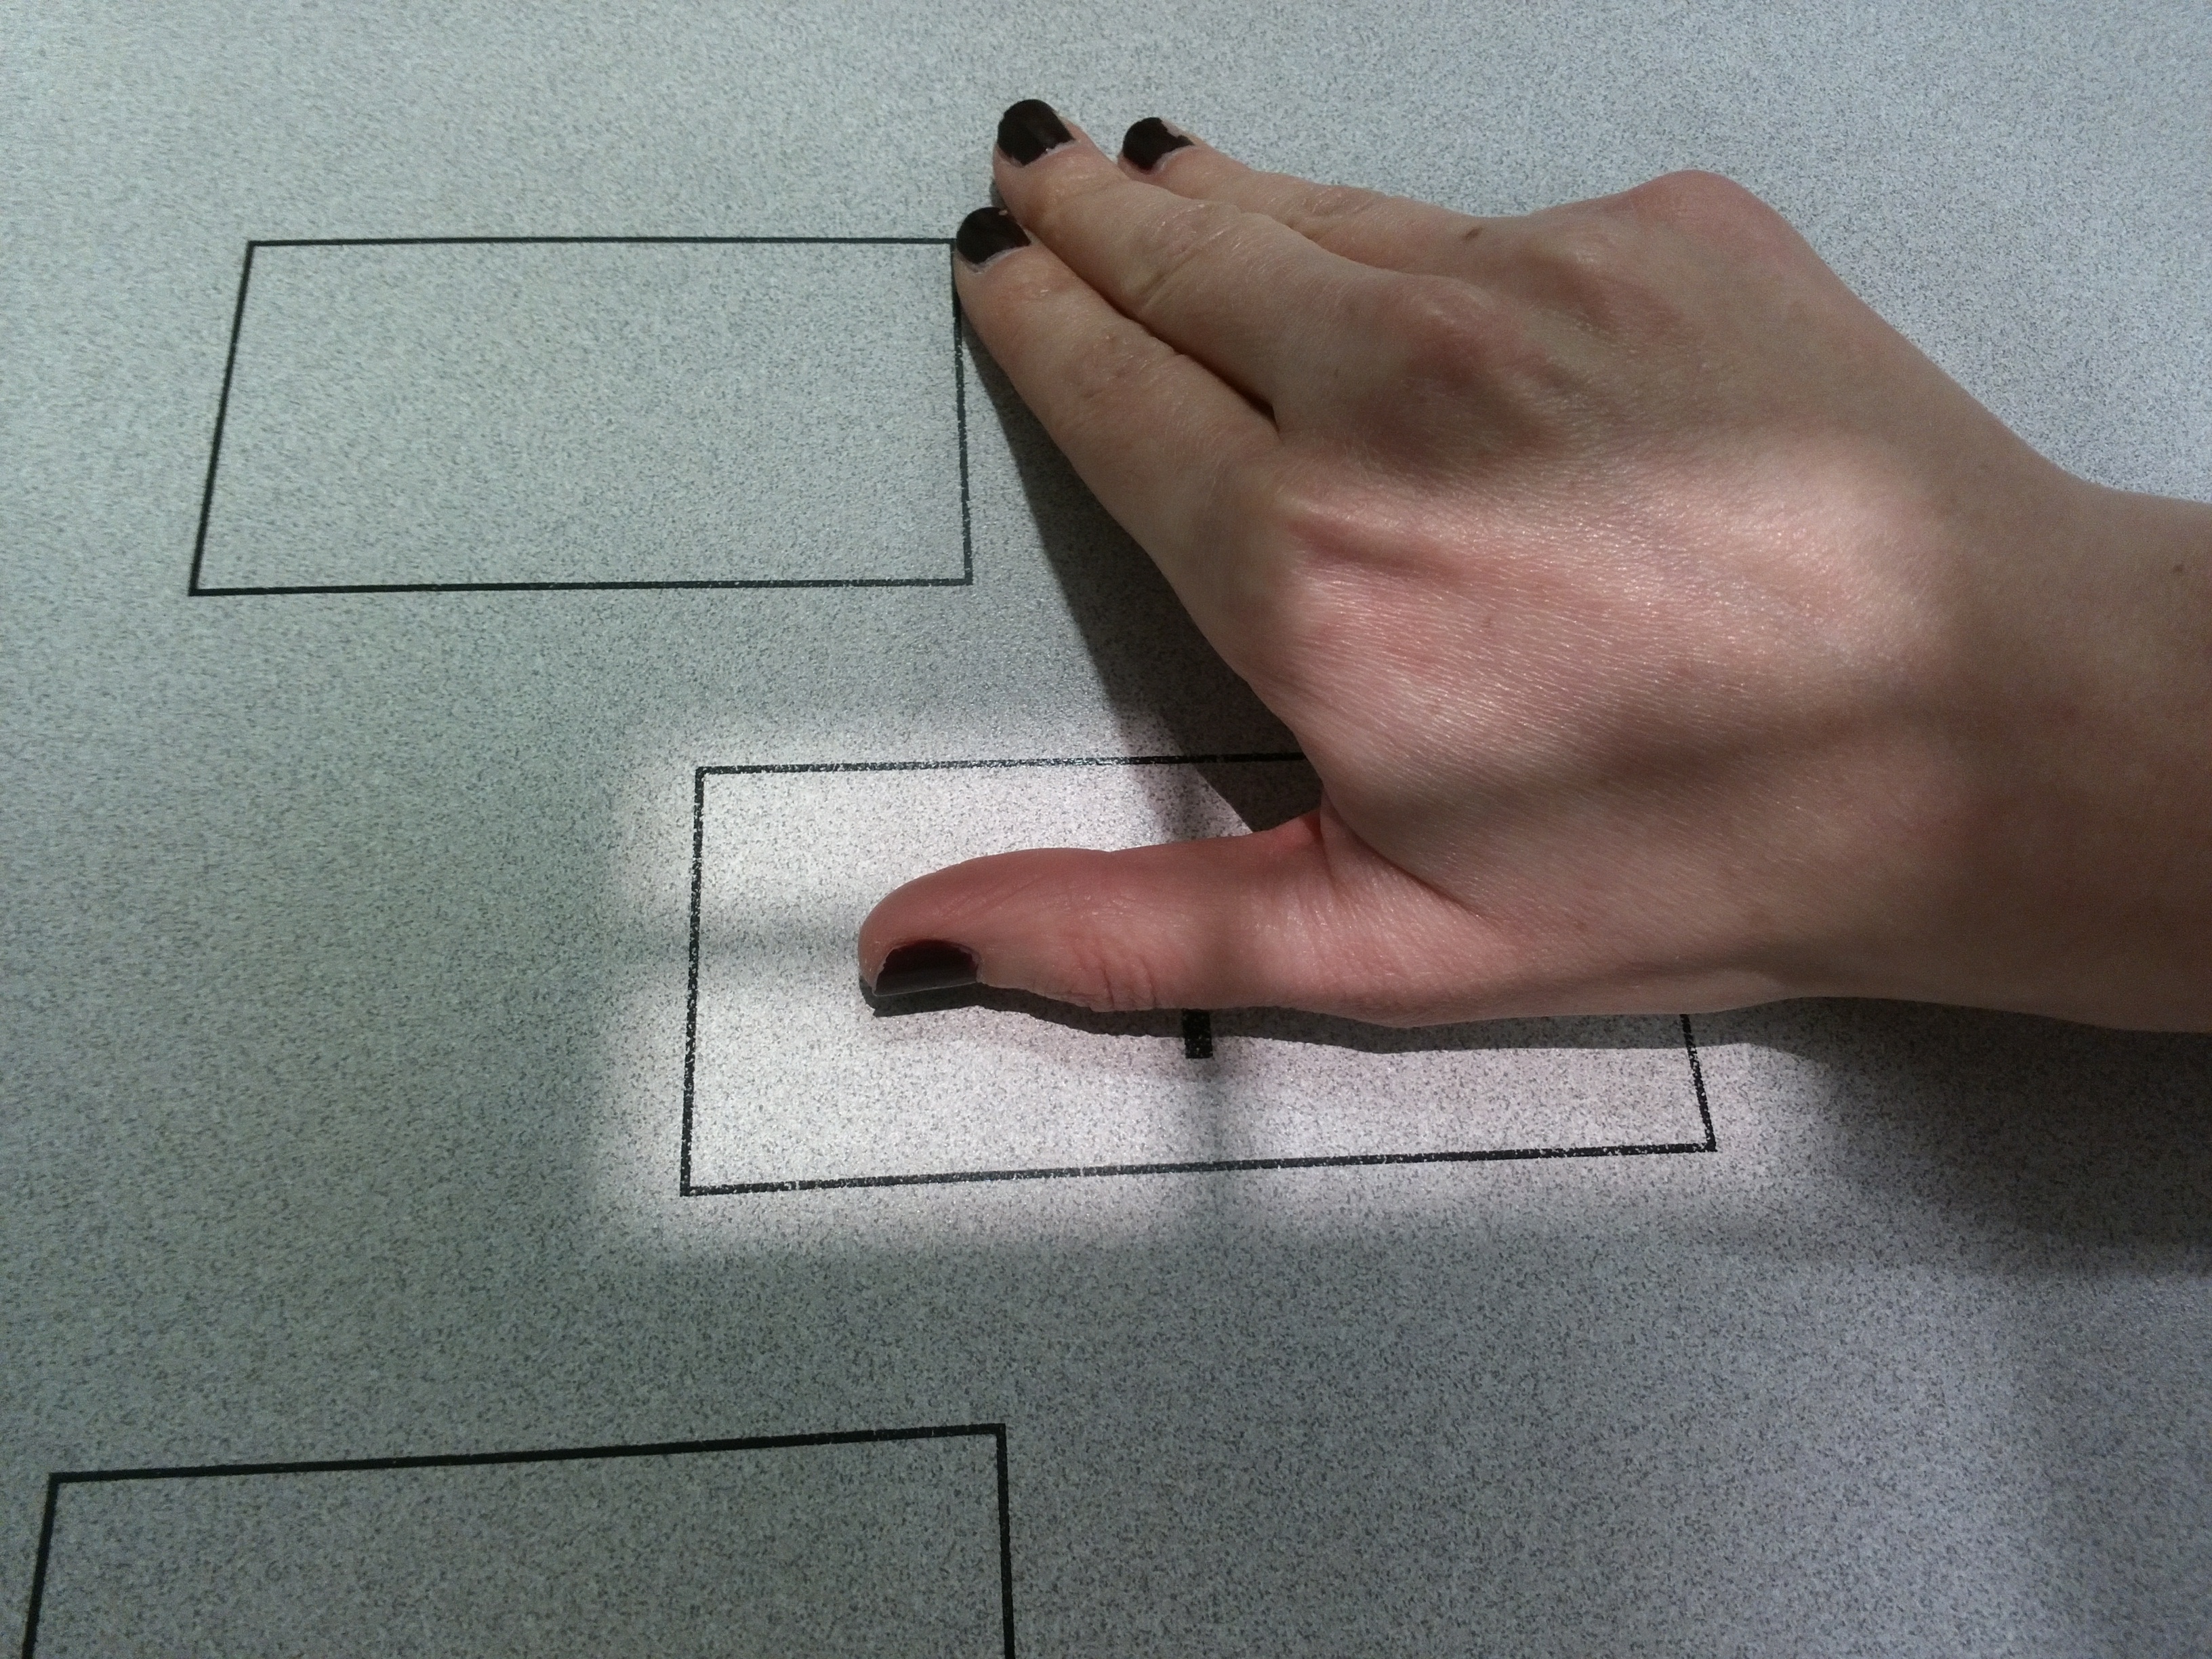
Patient Positioning
SPECIAL TECHNIQUE: INTERNAL ROTATION
The internal rotation of the hand and thumb is crucial to:
- Achieve a true lateral position of the thumb
- Avoid overlap with other fingers and metacarpals
- Clearly visualize the IP and MCP joints
- Allow evaluation of the trapeziometacarpal relationship
- Facilitate the diagnosis of Bennett fractures
Recommended Technique: The patient rotates the entire hand while keeping the thumb extended until a pure lateral position is achieved.
Central Ray
Centered at the metacarpophalangeal (MCP) joint
Specific Characteristics:
- Direction: Vertical and perpendicular to the plate
- Target: Metacarpophalangeal joint of the thumb
- Angulation: 0° (no angulation)
- Purpose: Simultaneous visualization of IP and MCP
- Consideration: Precise centering due to small joint size
Optimal Image Criteria
True Lateral
Superposition of phalanges
Joints in profile
No rotation of the thumb
Visible Structures
Trapezium and 1st metacarpal
Two complete phalanges
Three clear joints
No Overlap
Thumb isolated from other fingers
Open joint spaces
No overlapping artifacts
Patient Instructions
"Remain still during the examination"
Maintain the thumb in the lateral position without the slightest movement during exposure.
Breathe normally; avoid any movement of the hand or fingers.
Specific Clinical Indications
Common Technical Challenges
Frequent issues in lateral thumb projections:
- Insufficient rotation (not true lateral)
- Overlap with other fingers
- Movement during exposure (common in trauma)
- Painful position that the patient cannot maintain
- Inadequate exposure for small bones
- Poor placement on tripartite plate
- Incorrect centering (not on MCP)
- Thumb not fully extended
Solution: Ensure complete internal rotation and use aids for finger separation if necessary.
SPECIFIC EVALUATION OF THUMB FRACTURES
Characteristic thumb fractures to evaluate in lateral view:
- Bennett Fracture: Intra-articular base of 1st metacarpal with subluxation
- Rolando Fracture: Comminuted T or Y-shaped at base of 1st metacarpal
- Boxer's Fracture: Neck of the proximal phalanx
- Skier's/Gamekeeper's Thumb: Ulnar collateral ligament avulsion
- Reverse Segond Fracture: Radial collateral ligament avulsion
The lateral projection is essential for evaluating displacement and angulation of fragments.